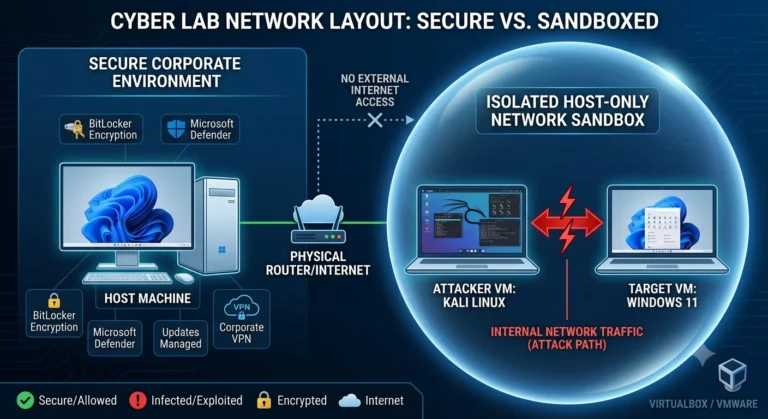
Establishing a specialized sandbox environment is a crucial step for anybody engaging in ethical hacking, virus analysis, or defensive engineering. Utilizing hazardous tools or executing unverified files on your primary operating system is an unwarranted risk.
Utilizing virtualization allows for the containment of hazards within a controlled environment. This post will instruct you on constructing a secure cyber lab on Windows 11 utilizing the recently available free-for-personal-use VMware Workstation Pro.
Building a secure cyber lab on Windows 11 using VMware Workstation Pro allows you to safely experiment with ethical hacking, malware analysis, and network defense. It costs nothing for personal use. The environment isolates all your security testing and intentionally vulnerable virtual machines (VMs) away from your main computer. Best VPN for the World (2026) – Top Secure & Fast VPN Services Reviewed
Hardware and Software Requirements for Your Cyber Lab
Prior to initiating virtual systems, it is essential to verify that your actual hardware (the “host” machine) can accommodate the resource requirements of concurrently operating several operating systems.
Checking Host Specifications (RAM, CPU, and SSD)
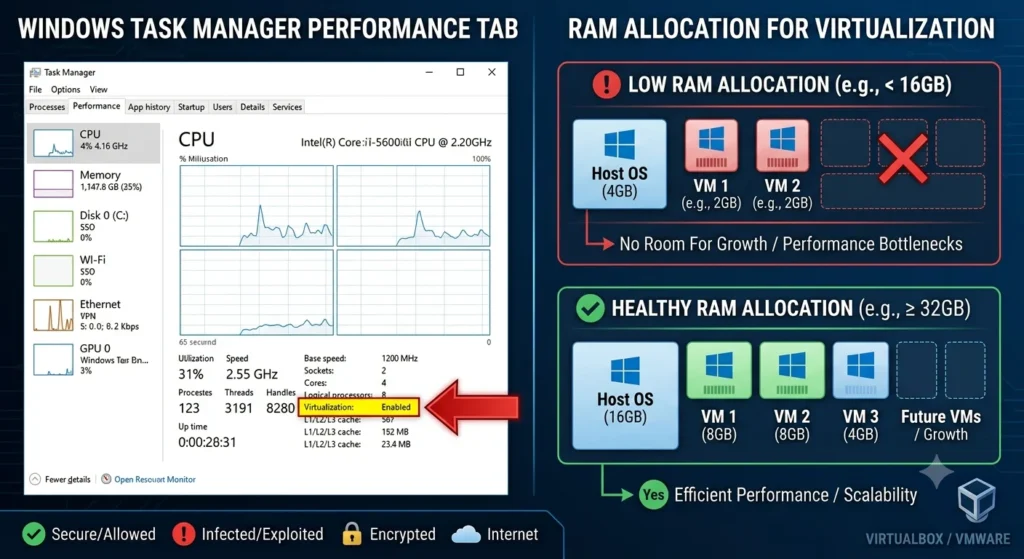
Checking your host specifications (CPU, RAM, and Storage) is easiest via the Task Manager or the Settings menu. These details are essential for troubleshooting performance, checking upgrade limits, or comparing hardware.
Virtual machines (VMs) rapidly use hardware resources. Should your host computer deplete its memory or CPU resources, both Windows 11 and your laboratory environments will experience significant performance degradation. To verify your specifications, right-click the Windows Start button, pick Task Manager, and proceed to the Performance tab.
To ensure a seamless experience, strive for the following fundamental specifications:
- RAM: 16GB minimum (32GB is highly recommended if you plan to run more than two VMs at once).
- CPU: A modern 4-Core processor (Intel Core i5/i7 or AMD Ryzen 5/7) with multi-threading.
- Storage: A dedicated Solid State Drive (SSD). Avoid traditional Hard Disk Drives (HDDs); VMs rely heavily on random read/write speeds, and an SSD prevents extreme disk bottlenecking.
Enabling Virtualization in Windows 11 UEFI/BIOS
Enabling hardware virtualization in your Windows 11 UEFI/BIOS involves three quick steps: entering the BIOS/UEFI menu, enabling the virtualization setting (such as Intel VT-x or AMD-V/SVM), and saving your changes.
Your CPU needs hardware-level virtualization enabled to run hypervisors efficiently. To verify if this is active:
- Open Task Manager and click on the CPU section under the Performance tab.
- Look for Virtualization: in the bottom right corner. If it says Enabled, you are ready to go.
If disabled, reboot your PC and access the UEFI/BIOS menu (often by pressing F2, F12, or Del at startup). Locate settings named Intel VT-x, Intel Virtualization Technology, or AMD-V / SVM Mode, enable them, save the changes, and restart your computer.
Read Also
- Introduction Free vs Paid Cybersecurity Courses 2026:
- Introduction Skills required for cybersecurity:
Step 1: Download and Install VMware Workstation Pro for Free
Broadcom changed the virtualization landscape by making VMware Workstation Pro Windows 11 completely free for personal, non-commercial use. You no longer need to rely on a paid license or settle for feature-limited player versions.
Download and install the free version of VMware Workstation Pro for personal use by creating a Broadcom Account. Navigate to ‘VMware Cloud Foundation’, select ‘My Downloads’, and choose ‘VMware Workstation Pro for Personal Use’. Run the installer as Administrator, follow the setup wizard, and complete the installation
Setting Up Your Broadcom Support Portal Account
Because VMware is now under Broadcom, downloading the software requires a registered account on their official support platform.
- Head over to the Broadcom Support Portal.
- Click on Register in the upper right corner and complete the account creation process.
- Once logged in, use the search bar or navigate to the “Downloads” section to find VMware Workstation Pro for Personal Use.
Running the Windows 11 64-Bit Installer
Once downloaded, locate the executable file (.exe) to begin configuration:
- Right-click the installer and select Run as administrator.
- Click through the standard setup wizard prompts, accepting the End User License Agreement.
- You can leave the default installation paths unchanged.
- When prompted to enter a license key, leave the box blank and choose the option indicating you are using the software for personal use.
- Complete the installation and restart your system if prompted.
Step 2: Configure an Isolated Virtual Network in VMware
Setting up an isolated virtual network in VMware is the most vital configuration step of this entire tutorial. If you leave your virtual machines on a default “Bridged” or “NAT” network, they will have direct access to your local home network. If a piece of malware escapes the VM via network scanning, it could infect your actual host machine, smart TVs, or family computers.
Configuring an isolated network in VMware (such as in VMware Workstation or vSphere) ensures your virtual machines can communicate with each other but are completely blocked from the host system’s network and the internet
Opening the Virtual Network Editor
To design an air-gapped sandbox environment, we must use VMware’s advanced networking utility:
- Launch VMware Workstation Pro.
- In the top toolbar, click on Edit, then select Virtual Network Editor.
- Since modifying network adapters requires administrative privileges, click the Change Settings button in the bottom right corner of the window.
Setting Up a Custom Host-Only (VMnet) Adapter
Now, we will strip away external network pathways to safely install a malware sandbox on Windows:
- Select one of the available host-only networks (such as VMnet1 or VMnet2), or click Add Network to build a brand new profile.
- Change the network type radio button to Host-only (connect VMs internally in a private network).
- CRITICAL STEP: Uncheck the box that says “Connect a host virtual adapter to this network (VMnet X)”. De-selecting this cuts off the network bridge between your physical Windows 11 host OS and the virtual switches.
- Uncheck “Use local DHCP service to distribute IP addresses to VMs” if you want to practice assigning static IPs manually, or leave it checked if you prefer automatic lab IP management without host connectivity.
- Click Apply and OK. Your virtual machines attached to this specific VMnet will now be completely blind to the outside internet and your home network.
Step 3: Deploying Your Core Cyber Lab Virtual Machines
With your secure infrastructure framework constructed, you can start populating your environment with the proper operating systems. A standard cybersecurity home lab tutorial setup includes at least one attacking mechanism and one target node.
Deploying your core cyber lab virtual machines involves selecting a virtualization platform (such as VirtualBox or VMware Workstation Pro for local hardware) and setting up three main environments: an attack system, one or more vulnerable targets, and a security monitoring/network control.
Installing Kali Linux as the Attacking Machine
Kali Linux is the industry-standard distribution for penetration testing, pre-loaded with hundreds of security auditing utilities.
- Download the pre-built VMware Virtual Machine image (.7z or .zip) directly from the official Offensive Security / Kali Linux website.
- Extract the archive folder onto your dedicated SSD storage.
- In VMware Workstation Pro, click File > Open, browse to the extracted folder, and select the .vmx configuration file.
- Before powering it on, click Edit virtual machine settings. Allocate at least 2 Cores and 2GB to 4GB of RAM.
- Under the Network Adapter setting, change the connection type from NAT to Custom, and choose the isolated VMnet number you built in Step 2.
Setting Up a Windows 11 Evaluation Target Machine
To practice defensive configuration, vulnerability assessment, or malware behavior tracking, you need a realistic endpoint target.
- Download a free 90-day evaluation enterprise ISO or an official virtual machine build from the Microsoft Evaluation Center.
- If using an ISO, click Create a New Virtual Machine in VMware, select standard configuration, and point the installer wizard to your downloaded Windows 11 ISO.
- Assign the VM at least 2 Cores, 4GB of RAM, and enable virtual TPM if prompted by the Windows 11 setup wizard requirements.
- Change its Network Adapter to the exact same Custom VMnet assigned to your Kali Linux machine. This allows the two operating systems to communicate with one another across an isolated virtual switch while keeping them safely cut off from the web.
Step 4: Critical Security Hardening for Your Sandbox
Even with an isolated network configuration, advanced software threats can sometimes employ “hypervisor escape” techniques to bleed through into your real computer. Implement these hardening rules to reinforce security.
Sandbox security hardening involves shielding isolated environments from escapes, zero-days, and agentic misuse. To secure your sandbox, use kernel-level isolation (e.g., microVMs), enforce the principle of least privilege, and use ephemeral (disposable) instances with strict ingress/egress network rules.
A robust security hardening strategy requires implementing several core defensive layers:
1. Hardware & Process Isolation
- Virtualization Boundaries: Isolate the sandbox kernel from the host kernel using microVMs, containers, or dedicated virtual machines.
- Dedicated Users: Run all spawned functions, developer tools, and scripts as low-privileged, isolated user accounts.
- Resource Limits: Prevent resource exhaustion by placing strict memory, CPU, and timeout limits on your sandbox environment.
2. Network & File System Controls
- Air-gapped Filesystems: Prevent read/write access to system files, configuration files, and folders outside of the designated workspace directory.
- Egress Restrictions: Implement egress filtering (allowlists only) to block unauthorized outbound connections, preventing data exfiltration and command-and-control (C2) communication.
3. Execution & Lifecycle Management
- Ephemeral Instances: Use disposable, stateless environments that are destroyed and rebuilt on demand to prevent attackers from establishing persistent footholds.
- User Approvals: Require user confirmation for any critical actions taken by agentic workflows or automated tools (e.g., executing arbitrary scripts or initiating network connections).
- Secret Management: Utilize dynamic secret injection to prevent API keys and environment variables from being embedded into the code and leaked.
4. Continuous Hardening Best Practices
- Data Masking: Never populate your sandboxes with production or customer data. Use synthetically generated, encrypted, or masked datasets instead.
- Routine Auditing: Regularly audit sandbox environment best practices to ensure that your configurations match the security standards of your production environments.
- Runtime Monitoring: Leverage behavioral baselining and logging to detect anomalies and immediately flag unauthorized actions.
For specialized guidance on securing agentic workflows, execution risks, and security hardening, you can refer to dedicated documentation such as NVIDIA’s Security Guidance or Cloudflare’s implementation.
If you’d like to refine your sandbox hardening, let me know:
- What specific technology or framework are you running (e.g., Docker, Kubernetes, AWS, a SaaS platform)?
- Is the sandbox being used for software development, AI agents, or malware analysis?
Disabling VMware Shared Folders
VMware features integrated tools designed to seamlessly share files across host and guest environments. While convenient, shared file systems act as an open bridge for wormable exploits.
- Make sure your target or malware-analysis VM is completely powered off.
- Click Edit virtual machine settings and go to the Options tab.
- Select Shared Folders from the left list.
- Check the box for Disabled. This ensures file executions inside the VM stay strictly locked inside the virtual hard drive (.vmdk).
Taking Clean Snapshots Before Testing
Snapshots act as your ultimate save-state button. Before you execute a single exploit payload, perform a network scan, or open a live malware sample, you must establish a baseline.
- Boot up your target virtual machines and configure them exactly how you like them (desktop wallpapers, specific diagnostic software installed, logged-in profiles).
- Go to the top VMware menu, click VM, hover over Snapshot, and choose Take Snapshot.
- Label it clearly as “Clean Base State” and save it.
If a malware sample locks up the registry, corrupts system files, or crashes the operating system, you can immediately navigate to the Snapshot Manager, click your clean state, and select Revert. Your VM will instantly return to its pristine condition.
Lab Architectural Quick-Reference
Use this structured breakdown to review how resources and paths should be distributed across your freshly built virtualization workspace:
| Virtual Machine | Recommended RAM | Network Adapter | Role in the Lab |
| Kali Linux | 2 GB – 4 GB | Custom Isolated VMnet | Offensive Security / Penetration Tools |
| Windows 11 Target | 4 GB – 8 GB | Custom Isolated VMnet | Defensive Logging / Sandbox Target |
| PfSense / Router | 1 GB | WAN (NAT) + LAN (Custom VMnet) | Optional Gatekeeper / Firewall |
⚡Build a Secure Cyber Lab · FAQ
Conclusion: Your Secure Cyber Lab is Ready
Establishing a local sandbox provides a regulated environment to comprehensively comprehend intricate infrastructure, offensive strategies, and malware vulnerabilities without jeopardizing your primary device. Utilizing Windows 11 as a sturdy framework in conjunction with VMware’s separated networking profiles has created a secure environment conducive to extensive experimentation.
Having configured your isolated virtual network in VMware, which tool or target system do you intend to install first? Please share your ideas below. If you have any installation issues, please post a remark, and the CyberInfoLab team will assist you in troubleshooting.
1 thought on “How to Build a Secure Cyber Lab on Windows 11 Using VMware (2026)”